Viewing entries in
Blog

RadioPopper Jr2 Love and Loss

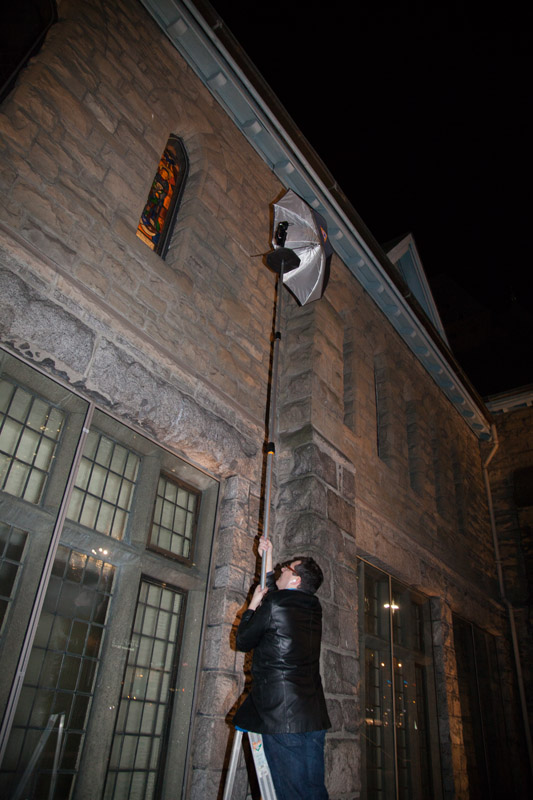
I've been a long-time user and rabid fan of the RadioPopper JrX triggers. When my first set of no-name eBay triggers packed it in 7 years ago, I made the move to JrX's, and didn't look back. The JrX setup has been awesome--it's been solid, reliable, and just about every piece of gear has survived the rough handling that we location architectural photographers subject our gear to. Yep, my receivers (and RPCubes) have been dropped off balconies, slammed into concrete floors, stuffed into crowded camera bags, and just about all my JrX kit is still going. Having said that, over 7 years I've had 2 (out of almost 10) RPCubes pack it in, and that many receivers pack it in as well, and I once had each plastic knob on a JrX transmitter successively fail (before the transmitter itself took the brunt of a 16 foot fall off my aerial pole rig about this time last year, smashing to pieces and probably saving my camera in the process). But all in all, my JrX gear is still going strong.

RadioPopper Love

When I had to replace a JrX transmitter after the aforementioned fall, RadioPopper had already replaced the JrX transmitter with the Jr2. Looked great, I figured. I could keep my backup JrX transmitter as a, well, backup, and get a Jr2 receiver as well to play with the nifty new stop-accurate control. The Jr2 setup has a number of really cool features:

  • Digital and stop-accurate control. This is awesome--since the JrX dials are logarithmic, the distance between a full power dump and half is a long ways, and then going from half to 1/128 is a series of really, really tiny increments that are difficult to handle quickly. I also have somewhat fat fingers, which makes it even tougher. The new mode dial is super sweet.
  • Per-channel kill switches. 'nuff said.
  • No more having to cable RPCubes all the time. This is really nice, or at least it should be if it worked with all my gear, but more on that later.
  • Built-in support for both my speedlights and monolights in the same module
  • Better battery indication.
  • Backlit display on the transmit unit.
  • An extra group--whee!
  • Receiver makes a nice flash stand
  • Upgradeable firmware. This is more theoretical since it's been a year and a half since introduction and RadioPopper still hasn't updated their firmware, although there's been a promised firmware upgrade for the receivers for...most of a year. sigh.

...and loss

As cool as the Jr2 gear is, it has some near-fatal flaws, and I'm hoping RadioPopper fixes some of these because despite singing the praises of the JrX gear, often and to anyone who would listen, I'm really disappointed with the Jr2 gear. I'm offering this up in the spirit of constructive criticism because I'd really like to stay with RP gear and not have to replace all my triggers. This is compounded by the fact that RadioPopper no longer makes (or at least no longer sells) JrX kit, so at the moment, I'm in the unenviable situation of having had a setup that worked being replaced with an inferior setup that kinda works, with super-annoying limitations.

The biggest issue for me is that my current flash collection consists of 4 WL1600x's, 5 550EXs, and a 580EXII. The JrX setup worked flawlessly with all that gear. The Jr2 receiver won't work properly (if at all) with any of my 550EX's, and this wasn't advertised in RP's lit. (If it was, I would have stockpiled JrX receivers.) I'm a big fan of the 550EX because it's durable (far more so than the 580's), cheap (sub-$150 used), has better range on a remote trigger than the 580EXIIs, and it can be optically triggered and power controlled via Canon's admittedly screwball optical triggering system as a backup. Which isn't very often, but when you need it, you really need it (there was that shoot at an RCMP detachment in Summerland, where I happened to be right next to a huge radio transmitter connecting probably every fuzz in the Okanagan Lake region with home base...yep, triggers wouldn't work there!). Sure, it's obsolescent gear, but dammit, it's solid, and it works!

I'm told by RadioPopper Support the lack of power control is because there were lots and lots of firmware differences across 550s, given how long it was in production. Sure, but, RadioPopper folks: you had a solution on the RPCubes that worked and was very solid (except after about 5 years of unplugging and plugging, where you'd have to pull your JrX receivers apart and replace the 1/8" sync jacks. Afternoon with a soldering iron, and a bit of cussing, and you're good to go.)  At the moment, the built-in hotshoe won't work reliably unless you kill power control in firmware, and you can't even plug the RPCubes into the Jr2 and have remote power. Right now, the only solution for getting remote power control on a 550EX is to use the RP JrX. Which isn't in production, and there aren't many available on eBay either. If there was a hack that would give me power control on the 550EX's via the RPCubes to a Jr2 receiver while I wait for new firmware, and it worked, I'd be a mostly happy boy.

It gets worse. Unlike the comparatively beefy JrX gear, the Jr2 gear is fragile. The mode dial on my Jr2 transmitter popped loose on its own accord a couple of months ago, necessitating an RMA. Which took a month (yes, I'm in Canada, but still: why can't they cross-ship, for the love of all things good and holy? Oh, and good thing I have that JrX transmitter as a backup!). When it finally did come back, the battery lid came back...pre-busted. To their credit, RP Support sent me three new battery lids, quickly, which took care of the problem (and will keep things going when the tiny ears on the lid break off again, which will happen when you're fumbling in the dark changing batteries on location).

Besides bad lid design, the Jr2's battery situation is icky in a couple of other ways. To its credit, Jr2 went from using the downright weird (and pricey) CR123A batteries to using much more standard AAA's. Now, the CR123A setup wasn't half bad once I got my hands on a dozen rechargeable CR123A's and a charger, but rechargeable AAA's are even easier to handle because I carry 48 AA's and chargers for longer shoots, and the AA chargers also all take AAA's, cutting down on the battery and charger count.

Or at least that's how it's supposed to work.

While batteries happily last for 10+ hours in the transmitter, which is more or less adequate, the battery life in the Jr2 receiver is horrible. On Energizer low-self-discharge rechargeables, it's rare for me to get more than about 5 hours...and when a normal shoot for me is closer to 10-12 hours, that means I have to change its batteries at least once if not twice. So, carry 8 spare AAA's, have to change them at the least opportune times per shoot...and hey, rechargeable CR123A's that last for days and days start looking pretty appealing.

When you have to change batteries on a device that frequently, another problem pops up as well: the spring steel that holds the batteries in place is weak and isn't, well, springy enough. About every 20 battery changes or so, these metal bits get loose enough that the batteries don't make a good connection and the receiver won't power up--or even more annoyingly, if you do something like clip your receiver upside down on a clamp to use it as a downlight, your receiver will lose power. Of course, a fairly minor drop of a few feet with batteries in will cause the metal pieces to over-bend immediately, killing your transmitter or receiver until you pull out your Swiss Army Knife and bend the metal bits back to their proper position. (The JrX's would take this sort of (ab)use with no problem at all). And eventually, as happened to me on a shoot earlier today, one breaks. I'm a long way from home at the moment, so first thing tomorrow I get to find a small spring to jam in there to make it work.

Which brings me to a bit of a dilemma. My Jr2 receiver is still just barely under warranty, and it's Georgie season, which is the busiest time of the year for me, and it's also the time of the year where I'm most likely to need to fire all my external flashes. Because it's at least in theory still under warranty, my temptation is of course to ship it right back, but that's going to probably mean having it out of service for a month. Yecch. That's a non-option, so jury-rigging a spring in is going to be the way to go until early October, when I can stand to have another receiver out of service for too long--and if they decide that I've voided the warranty by having to self-service the battery holder, I get to pop it open and solder a spring on. Or probably two, while I'm at it.

The other big problem is: I'm already short one receiver. I can't just buy another JrX receiver as they're basically unobtainable, and I don't want to buy another Jr2 receiver until I know it's going to work with my 550EX's, and the battery life gets even marginally better. Remote power control is something I'd be loath to give up across the board, given my propensity for putting small flashes in odd places in large architectural scenes. So if I want to use all 6 speedlights, one (at the moment) has to be on a Wein peanut, which is a backup-backup solution. This, obviously, doesn't make me happy because I like to have at least one backup of any part of critical workflow, and radio flash sync is critical workflow for me. The whole battery situation has me even more wary of getting another Jr2 receiver, because it's going to mean...managing another 8 more AAA's on location.

I really wish the Jr2 receivers would work as well as the JrX's did, because if they did, the Jr2 would be really truly amazing--and true to RadioPopper's usual tradition of providing excellent price-performance. However, it's looking like my only real solution at the moment that's going to work going forward, and work with all my equipment, is to dump my RadioPopper gear and move to PocketWizard MiniTT1/FlexTT5 gear. Which is more durable but way less convenient (and more f***ing modules, because rather than a stack of receivers and a trigger, I'd end up with 6 Flexes, the AC3 zone controller--to get manual remote power on my Phase gear, and 4 AC9 adapters.) Oh, and it's at least twice as expensive.

RadioPopper: any plans to rectify this situation before I decide that this is the last straw and move to PocketWizard?

Get That Georgie!

Teragon Mayfair outdoor room Summertime, and the living is easy, right? It's Georgie Awards time again, and we think putting together an entry should be equally easy. You can even learn how, from the comfort of your outdoor chaise longue with a drink in hand--but more on that later.

We're trying something new this year. As those of you who've done a Georgie Awards entry know, there are three major parts to an entry: your written copy, the photos, and your plans/budget. The latter part we can't help you with, but for the last few years running, we've often worked on projects where we've closely coordinated our photography with the work of local writers. This year, we're working even more closely with the written side, and are offering packages that include BOTH the photography and the writing in one coordinated package. You'll benefit from the combined expertise of Susan M. Boyce, one of our fine local writers with over 65 winning projects in the last 5 years (and she's been writing Georgie entries since nearly the start of the Georgie Awards, over two decades ago), and our similarly well-known expertise photographing your projects.

This is a great thing if you're entering the Georgies--or any other soon-to-be-opening building award like the Ovations, SAM, or VIBE awards. It makes your administrivia easier--there's one price and one invoice that covers it all. It also gives you better results, because your photos and your written copy will tell one story in perfect sync.

We also understand that entering the awards for the first time is often difficult, and so to make it easier and cheaper, we're offering a first-timer discount for a limited time. We're also putting on a webinar to help you out. That's on August 11, and you can experience it from your own computer (or tablet, or...).

Check it all out!

The Joys of Medium Format Digital

If you've had us photograph a medium to high end architectural or interiors project over the last couple of years, you've likely noticed that I'm often using a slightly crazy-looking camera outfit: Cambo Wide DS and Phase Medium Format

This is a technical camera, with a medium format digital back made by Phase One. If you've been around the photography world for awhile, you'll recognize this as the direct descendent of what used to be one of the standard tools for architectural photography: the 4x5 view camera.

viewcamera

Yes, that's a younger me underneath that darkcloth making use of one, and yes, I still own and maintain that setup though it's largely collecting dust. I did end up pulling it out a few years back for a project for Iredale Group Architecture, and then again for a workshop at Vancouver Photo Workshops. It produces lovely images, and if you want me to use it on your project, just ask--but be willing to wait a lot longer and pay a good chunk of extra change to cover film, development, and scanning costs (hey, vintage goodness is pricey!). The lovely thing about the medium format digital rig is that you get even better quality than on the 4x5, with the speed of digital. It's still big, expensive, and cumbersome...but it's usually worth it.

So Why Use Such A Beast Of A Camera?

Get photographers together, and the talk inevitably turns to gear; but as anyone on a construction site knows, the equipment is there ideally to support one's ability to do Really Excellent Work. For architectural photography, medium format digital is one of the current best tools for the job as far as giving you high resolution, amazing dynamic range, the most flexibility to use your images, and a particular lack of distortion that you'd get working in smaller formats.


Dynamic Range

Dynamic range is all about maintaining detail in both the light and dark areas of an image, where the brights are really bright and the darks are really dark. This situation happens a lot, particularly when photographing daylit interiors. Our eyes and brains have a much greater dynamic range than any camera, which means that if you've tried to shoot an interior with a daylight view, you've probably gotten an unhappy compromise like the top image, when you really wanted something that looks like the bottom:

DRFlash

There are a half dozen or more ways to deal with this problem, and we use just about all of them. However, often the best way is to start with better materials: namely, a camera that gives you more dynamic range to begin with. In a couple of shots, you've captured what you need and can work with it to pull out the detail you need. We recently photographed this stunning modern beauty for Kerr Construction, and it featured an entryway with a piece of stained glass that, in bright light, lights up the architectural concrete floor: Medium Format Digital Vancouver Modern

This is a tough shot to pull off because the bright colours of the window and the subtle colour detail on the floor, both so important to the project, don't photograph as well in any other medium; and here, they captured beautifully and realistically.

Extending Twilight

We love twilight exteriors and interiors, and we bet you do too. From a photographer's point of view, one of the big problems with twilight is that it doesn't stick around very long. In summer, it's a lovely almost full hour of gorgeous light, during which we can run around and get fine photos. But in winter, twilight lasts for nary more than a few minutes at best. Medium format digital is great at pulling colour and detail out of dark areas, like dark skies at the end of twilight. This sky was almost black to the unaided eye when we photographed it, but the camera happily pulled in the detail we needed to make the shot work:

Yunesitin First Nation Health Centre Williams Lake wood architecture

Perspective

The medium format digital rig, as a good camera for architectural photography should, has the ability to shift the lens so you can look up or down while keeping verticals vertical--and if you're running a one-point perspective, keeping your horizontals horizontal. But there's also something more subtle going on here.

You've probably had the experience of seeing the final images of an interior (particularly in inexpensive real estate photography, a genre in which this is usually considered a feature) and exclaimed "Wow! That tiny bathroom looks as big as BC Place!"; and then later on, someone who experienced your project from photos first probably said "Wow! That big bathroom is actually pretty tiny!" That's wide angle distortion (or if you want to impress your friends at cocktail parties, volume anamorphosis), and it's a particular bane in very large and very small spaces. On a medium format digital camera, there's a lot less of it because the sensor is larger and the focal length of the lens can be longer, which means you get a "flatter" look. It's still present, but it doesn't jump out at you in the same way as it does in smaller formats. Look here:

medium format perspective

These two images were taken at the same position a few minutes apart, and are unretouched except for cropping and matching the colour temperature between them. The image on the left is off my full-frame Canon 5D Mk II, and the one right is medium format digital. It's subtle, but you'll notice that the one on the right looks less stretched. You'll also notice, once again, the extra detail on the ceiling wood and the stained glass light on the floor.

Flexibility

One of the great things about having lots of resolution and lots of detail is the ability to crop your images for various uses and pull more photos out of a single image. Let's take this patio, renovated by Rembrandt Renovations last year, and see this in action:

Exterior Patio Vancouver Spa

The builder of this project was justifiably proud of the woodwork on the pergola. So, let's take a crop of just the pergola and see what we see:

Pergola

And there we go, the pergola...in all its lovely wooden detail.

Getting the advantage

That's the easy part: call us, and you get all the wonderful advantages of this format as part of the photos we deliver, without the five-figure-plus investment required to buy, maintain, and run all the specialized equipment. You'll get images that are cleaner, closer to the reality of being there, and give you more flexibility across your various marketing channels. Since it's technically demanding, it does mean that things sometimes take a little longer to shoot on location, but the results, as you can see, speak for themselves. You're getting more value from your project photography, as well as a look you can't get elsewhere in town. We're also one of the few (if not only) local photographers to be using this gear on the majority of our projects, so you'll get work that definitely stands out from the pack, just like you!

An awards season ends...and another begins!

  Ovation Awards

It's always great when our clients win awards, and this past award season has been a banner year, with at least 17...yes, seventeen...finalists or winners from our client base. We've had clients place in just about every major local building industry awards, as well as a number of local and national wins. There's been lots of celebration, thanks, and bragging rights bestowed all over for some truly excellent projects.

We always recommend that if you go to the effort of having a place photographed and doing your awards writeup, you should try to make that work go as far as possible by entering as many awards and as many categories as your project could reasonably win. For instance, a condo renovation could place as a condo renovation (of course), but also bathroom, kitchen, heritage, sustainable, etc. if it also has these qualities. And since many awards programs have similar requirements, if you've done the work for one, you've also pretty much done the work for another, and the entry fees are inexpensive once you have everything all rolled together and ready to enter. (Just read the requirements carefully as there are always a few little 'gotchas' to check and pay attention to).

Our clients took this to heart this year: almost all the projects placed in either multiple categories, multiple awards, or both. Bravo, everyone!

To paraphrase Iron Chef, "Who got it? Who won? Whose projects reigned supreme!?"

Teragon - Mayfair

The crew at Teragon called us just a few days before the Georgie deadline needing exterior, outdoor room, bathroom, and a few other fill-in photos for a finely renovated Shaughnessy mansion. A goodly chunk of the house had been previously photographed earlier in the project by another photographer, but several areas weren't complete at that time. Luckily, we were able to fit them in, and even luckier still: as often happens in the fall, the rain stopped and the clouds parted for the two hours we needed to get solid images of the outdoor areas.

Teragon Mayfair outdoor room

This project was a finalist for Best Residential Renovation >$800K and Best Outdoor Living in the Georgie Awards, finalist for Best Bathroom and Best Exterior Reno in the Ovation Awards, and the winner in Best Outdoor Living Space in the Ovation Awards, among others.

Reid Development - Eton St.

We originally photographed this sweet heritage renovation for the GVHBA Parade of Renovated Homes--the Reid folks needed exterior and a few choice interior images for the parade brochure and PR--and then came back to rephotograph it later in the season when a few things that weren't quite done by the parade were finished off.

Reid Eton Vancouver exterior

This project was notable for combining aging in place features with a sensitive treatment of a heritage structure, and for this, the project was a finalist in Best Heritage Renovation, Best Renovation $500-800K, Best Exterior Renovation, and a winner for Best Accessible Reno in the Ovation Awards, and a finalist for Best Residential Reno $500-800K in the Georgie Awards.

TQ Construction - Lynndale Retreat

Lynndale Retreat, a renovation of an early-1970's house on a cul-de-sac in central Burnaby, was one of the coolest projects we photographed last award season. As with Eton St., we first visited the project before the Parade of Renovated Homes and shot preliminary photos for parade PR, as well as videos of what has to be one of the best laundry features I've seen in a long time: using a roll-up garage door on the interior to conceal a full laundry station with shelving, work space, ironing, and so forth.

TQ Construction roll-up interior laundry door

TQ Construction Lynndale cozy modern interior

Lynndale was a finalist in the Best Residential Reno $300-$400K in the Georgie Awards, and a finalist in the Best Kitchen >$100K category in the Ovations. We got a wonderful surprise on this one: it's the second CHBA National SAM Award winner we've photographed. We've found that more unusual design and architecturally oriented projects tend to place well in the SAMs, even when they don't necessarily place well in local awards; this was a perfect case of this. Different judging, different criteria.

TQ Construction - Spruce Avenue Kitchen

It's always fun when you've photographed projects that compete against each other--you get to cheer loudly twice at the awards gala! This was the case with this fine kitchen+greatroom renovation, brought to you once again by the folks at TQ Construction:

TQ Construction Spruce Avenue Kitchen Greatroom

Spruce Avenue was a finalist (along with Lynndale) in the Best Kitchen category at the Ovation Awards. It was also a finalist in the Best Kitchen >$100K category at the Georgie Awards.

Porte Development - Lift at UniverCity

I'm an SFU grad, and opportunities to photograph back at the alma mater are always welcome. We've made three visits to Origin, Porte's nearly-neighbouring project on the hill (twice for their successful Ovation and Georgie submissions a couple of years back, and then once again when one of our realtor clients Robert Crowe had us shoot a unit he was selling in the building), so it was great to see what Porte has been up to with their innovative mixed stacked townhouse/apartment project:

Porte Origin at UniverCity SFU Burnaby

Lift brought home the Best Townhouse Development award at the Ovation Awards. Since we photographed this project in frigid January, we wish the Porte team all the best in the upcoming Georgie Awards and whatever else they enter.

Tien Sher Group of Companies - Jade

The Best Townhouse Development category in the Ovations was another where had two projects competing against themselves: Porte's Lift won, and Tien Sher's Jade, on Alberta Road in Richmond, was a finalist. Bravo to both of them! It was great to work with Tien Sher again after a couple of years hiatus for us as they busily built out several projects.

Tien Sher Jade Ovation Townhouse

Prior to this, we  photographed their Quattro3 project in Surrey, and when we were recently photographing their new Balance micro-loft project, Caroline Jecklin, Director of Marketing, referred to our still-often-reproduced image of their Quattro3 project as "one of the prettiest shots we have of any of our projects!":

TienSher-Quattro3

...and another award season begins!

Summer's almost officially here, and the weather's been amazing. We've been shooting some great projects already, and we have it on good authority that the Georgie Awards call for entries will be coming up in July. It's time to start scheduling your awards photos while we have great weather...and the earlier you have us photograph your project, the cheaper it will be and the easier it will be to schedule. We'll have awards packages up soon, but early birds get even better deals, so get in touch!

A loud bang and a big splash

Those of us who own boats usually do everything we can to keep them (either ours or our friends') from sinking. So, it's a rare occurrence to get to watch one--not one's own, naturally--take its final voyage down to Davy Jones' Locker. While it took years of prep (of various varieties, including a couple of lawsuits) on the part of the Artificial Reef Society of BC to make it happen, the actual sinking of the HMCS Annapolis in Halkett Bay on Gambier Island, for the purposes of creating an artificial reef, took just a couple of minutes. Made for a fun shoot and a fine day out, thanks to my friend Sean Murphy being in the right places and knowing the right people to have a bunch of us end up on the right boat in a great position to watch the Annapolis go down. Just like a good twilight exterior: lots of prep, a seemingly interminable wait...and then a few minutes that leave you with amazing photos if you do it right.


Happy North Day...er, First Day of Spring!

Spring's busting out all over! Even if it's damp and rainy today, it's time to celebrate. Go enjoy drippy but beautiful cherry blossoms, or try balancing a raw egg before making your morning omelette, or if you're Wiccan, we wish you a happy Ostara. We architectural photographers in the Northern Hemisphere have another thing to celebrate: the return of direct light on north-facing elevations at dawn. Happy North Day to all our clients! Here's a north-facing elevation we photographed just after dawn a few years ago from the roof of a neighbouring building for Drahan Petrovic, project architect: Sapphire Vancouver north elevation

Between now and the Fall Equinox, the sun begins rising increasingly further north of due east and setting increasingly further north of due west, so that means that if your building faces north (and a lot of interesting buildings south of Burrard Inlet do, to maximize their views), we can actually get just a bit of light on that north elevation that, for six plus months out of the year, doesn't get direct light at all unless we bring out a pile of lighting gear and create our own.

So, if your building faces north, and you've been waiting for us to photograph it, it's time to start thinking about getting it photographed while Mother Nature makes it easy. If the elevation you want us to shoot faces northeast, you likely have a few more weeks to figure things out before first light becomes really usable (that's due to weather and, for Vancouver projects, the height of the North Shore mountains blocking true first light), so get planning.

And on that note, happy spring, everyone!

PSMW Illuminated Modernism

We photographers know a few things about the power of lighting to transform and inform one's experience of built space. One of my favourite ongoing installations during Modernism Week has been Illuminated Modernism. About a dozen and a half historically significant buildings along Palm Canyon Drive have been specially illuminated for the week, both with standard gelled lights (of the sort I'd use to illuminate buildings for twilight exteriors), and with gobos that show the name of the architect and the date of construction for the building. This really changes the way you view the buildings as you drive into or out of town: through the addition of special lighting, a number of relatively banal buildings have become much more attractive, and some already cool buildings have become, well, even cooler. I've been thankful that the special lighting has been running all week, because it's given me several opportunities to go shoot twilight exteriors for the fun of it (you know you're an architectural photographer when you willingly subject yourself to the pressure of shooting twilight exteriors for fun, without a client paying you for it...) without the pressure of having to shoot everything in one night, which would be clearly impossible.

I'm thinking it would be great to do a version of this in Vancouver sometime, possibly for Vancouver Design Week. There would be a number of interesting challenges involved in doing this in an urban environment (apparently in the years they've been doing this, they have had a few Source4's go for a walk). If you think this would be a project you'd want to participate in, please let me know!

Kaptur One

Yes, I successfully passed my Phase One Certified Professional training from last week (which, naturally, includes a bunch of really cool Capture One tricks). And no, I did not, I repeat, not go on a tour of Hugh Kaptur-designed homes in Palm Springs just for the sole purpose of cracking the pun that appears as the title of this blog post. Yeah, right, you're saying.

OK, fine. Enough of that, and on with the photos.


This was a curious tour, since it was largely tract homes (and one that's more in keeping with Kaptur's commercial work). Much like the Vancouver Heritage Foundation's Vancouver Special tour, when everything is a similar housing typology on a similar plan, the fun becomes sussing out differences in renovation, planning, and interior design practice. There were two (and possibly three, depending on how you count) duplicated plans in this tour, as well as several unique places. I had a clear favourite, and you can probably guess which one it is (the walls and the kitchen give it away). Dangerously, that particularly notable place is for sale...for the ridiculously cheap (at least by Vancouver standards) price of $459,000.

Car-chitecture

Palm Springs Modernism Week, besides having a lot of events on its own, has several "sidecar" events, including an art show, midcentury fashion shows, a classic renovated Airstream trailer show (that's Saturday, and I might just take a look at it...for the joy of photographing in really teeny spaces), and a classic car show. When I was wandering over to a furniture/accessories tradeshow just to satisfy my curiosity, I stumbled upon the car show. I'm normally not one to appreciate many aspects of car culture. However, just like people who own heritage houses, I was impressed with the level of detail, care, and love people put into restoring these classics...from the era when efficiency wasn't the paramount concern, and cars could be legitimately viewed as sculpture on four wheels. So, here's the whole show in one collage. You'll probably want to click to zoom. Palm Springs Modernism Week Car Show - in one image

Mecca for (Midcentury) Moderns

This year, I'm finally doing Palm Springs Modernism Week. I've been desparately wanting to go for the last couple of years after local architect Don Luxton told me about it, and this year I got myself on the mailing list early enough to be able to get tickets for some of the interior tours--which, as everyone who's a fan of midcentury modernism knows, is where most of the juicy architectural and design goodness is. I have a full schedule ahead, but I got off to a great start today with the opening Signature Tour, which featured a number of marvellous places, including a "bonus house" next to one of the tour houses. The "bonus house" wasn't officially on tour, but it was for sale, and an enterprising local realtor took the opportunity to get a lot of design enthusiasts through their meticulously staged listing, and probably sell it faster. (Local realtors, take note, if you have a place that's on the route of a self-guided house tour). Highlights:
  • Experiencing Donald Wexler's (former) family home, largely from the outside. Almost all of the bedrooms, and the terrific master ensuite, were closed to tours from the inside. But wait! There isn't a single curtain in the place, there's glass all over, and there's a pathway along the outside. So, you can experience the place as an architectural vitrine. This place admittedly would have been just great in the evening. (In fact, that's when Julius Shulman and Jurgen Nogai photographed it. I'll have to go look at the 'Julius Shulman, The Last Decade' book on my bookcase when I get home and see if it's there).
  • The working 70's era built-in toaster and built-in Brewmatic at a Lawrence Lapham house (which featured nary a right angle in the entire place). I've yet to see a built-in toaster in a new place, but the Brewmatic is one of the progenitors of having a built-in espresso machine, which Miele and others make (and I've photographed in a number of new houses).
  • The William Kreisel "Pod House". The whole master bedroom, closet, and ensuite double bathroom was something else...and the peek-a-boo sight lines and level changes through the place separated spaces in a very clever way. Not a house I'd want to live in, but it was certainly fun to wander through.
  • The first Krisel house in Twin Palms, affectionately renovated by its current owner. Sadly, said owner didn't allow interior photography, so I couldn't shoot the master bedroom and ensuite, which were one of the major highlights of the place.

As Joe McNally would say, 'more tk'. There are enough events, tours, walks, and other goodness that even if I had unlimited budget (or media accreditation), I'd likely still end up with a bad case of FOMO.

Merry Christmas...and to all a good BTS!

This past year, Christ Church Cathedral has been celebrating the 125th anniversary of its founding. One of many celebratory occurrences has been the acquisition of the classic crèche scene from the old Woodwards department store, which was formerly sometimes on display at The Bay. In addition to singing in the choir and serving on many committees over the years, I've often been responsible for architectural photography of the space and things in it--and with two (and soon to be three) renovations at the Cathedral since I joined in 1998, that's been an important ministry as well as leading to all sorts of other interesting work. This time last year, I got the opportunity to photograph the crèche--since at that point we weren't sure what its future was going to be. It's since been donated to the Cathedral officially by the Bay, ensuring that it will be on display in a happy and appreciative home. Cathedral Creche

There are a bunch of challenges involved in photographing the crèche, largely owing to the small space it's displayed in. Since the west alcove is only scarcely larger than your average bathroom, that's a lot of stuff for a small space--and a lot of extra light to carefully pack in and, likely, remove in post. That of course took a good couple of hours of carefully placing and flagging hot lights to bring out the detail in the wood. It's not just a group portrait executed in wood--a lot of the detail isn't in the faces, and getting that out was an effort powered by a half dozen PAR hotlights.

The more interesting challenge was getting light on the 'Mary' window after hours. Since I wanted control over all the light, I had to shoot the crèche after hours (which since it's winter, only means about 4pm). However, from experience (being bored during all those committee meetings!), I knew that light pours through the Mary window at around 11 each day as the Hyatt next door essentially functions as a gigantic bounce card, dumping nicely filtered, coloured, and angled light onto the west alcove. I thought it would be neat to incorporate this light into a photo of the crèche...but that wasn't going to happen after hours without putting a remote flash outside and creating that light myself.

Which I did, thanks to my assistant Andre holding a RadioPopper-equipped flash on a long pole atop an extension ladder outside. Amazingly, there was enough signal getting through the window and heavy stone wall to (most of the time) trip the flash.

_MG_9852

If you haven't been by the Cathedral yet to look at the crèche in all its glory, it's worth a visit. It will be on display until January 6, so check the Cathedral's website for hours and stop in. Merry Christmas, everyone!

Night Shots: Twilight Exteriors

Yesterday was the Winter Solstice, which means that beginning today, every day gets about 15 seconds more sunlight! In honour of that, here's a Pecha Kucha-style talk I did at GVHBA Suppliers' Council a couple of months ago on twilight exteriors--which are a lot more difficult this time of the year because we have so little time in which to shoot them. Golden hour exteriors are, of course, much easier if your building faces south because we get that low golden winter light all day. That's assuming it's not cloudy and rainy. Watch:

How To Win a GVHBA Ovation Award

Are you looking to submit a project for the Ovation Awards? We've been there since...well, the Ovation Awards were called the RenOvation awards, and every year we have a number of projects in the finalists' and winners' circles. If it's your first time entering, we know it can be a bit of a bewildering process if you've never put a project in for an award before. If it's your second, third, fourth...you're probably looking for some tips! Check this out:

Deck The Halls...or not!?

It's December, and that means the holidays are right around the corner...already. That probably means there's some holiday decorating in your future--and if you aren't decorating, your clients probably are. I live in a tiny downtown loft, and while my place certainly has the height for a tree, it doesn't have the floor space, which means I'd be hanging a tree upside down from the ceiling fan. I can hear the meows of encouragement from my cats right now on that one (and the sound of my landlord using my damage deposit refund cheque for wrapping paper, at the same time). So I get to keep it simple and enjoy what other people do with their places, living vicariously when I'm visiting with a camera. Besides decorating, one of the other great holiday traditions is...wait for it...saving things until the last minute! Or, taking pleasure in being that annoyingly well-organized person who's always bragging to your friends that you had your Christmas shopping all done before Hallowe'en. Here's a protip: if you want your photo to appear in holiday issues of your favourite design and shelter magazines, you want to be a few steps further ahead of the holiday rush than people in the "get it all done before Hallowe'en" crowd. Yes, I'm saying: if you have a seasonal project, get us to do your "holiday" photos now so you can be ready for the holidays NEXT YEAR.

Why so ridiculously early, you ask? Let's say you're a magazine that publishes bimonthly or quarterly, as a lot of high-end home and shelter magazines do. That means you have a November/December or December/January "holiday" issue, or a November-February "winter" issue which needs at least a few pieces of holiday content. Magazines have a month or more of 'lead time' before they go to press, which means putting together your holiday issue in September or October. This year back in October we'd just licked the last of our Georgie Awards shooting and had such generally bright weather that aside from fall colour, we could still pretty much make a place look like it was still midsummer. And back then, nobody had their Christmas decorations up yet. So what's an editor to do? You can of course put a bunch of holiday decorations up as staging and shoot them, or Photoshop them in, but both of those things are labour-intensive and expensive because you're going to have to commission someone to do all that (virtual or real) decorating, and then hire me to go out and photograph it as a special project. Or, if you're like most magazines that prefer to use submitted content rather than photographing their own articles, you're stuck with using projects that were photographed last winter. That way, by the time faithful readers are sitting by a fire watching the snow come down and catching up on a year's worth of periodicals, you can show images that look like you could magically move yourself in without even getting up out of your cozy chair.

Cozy holiday fire, shot last November

Like that. And the only way to be the project that the editors pick for that issue is to have your images all ready for an early fall deadline is to shoot your project now and keep it around for next holiday season. You don't have to worry about being picked on for being ready too soon: editors and media folks will in fact love you for being ready and providing them with images that will work when they're desperately in need of them. The image above was part of a shoot for the Vancouver Heritage Foundation's regular article in Homes and Living Vancouver,  shot...you guessed it...a year in advance. So, you have our full permission to be that person who's overly well-prepared. We'll even help with it! How cool is that?

Now, it might happen that you find yourself in the opposite situation: it's the holidays, but you're wanting to shoot non-holiday interiors and exteriors...possibly for your Ovation Awards entry, and you're an early bird so you don't want to wait for the new year to shoot for a January 19 drop-dead date. Your client decorated for Christmas, but you (and the judges, presumably) don't want to see the decorations in the photos. What are you going to do?

You have a couple of choices. Depending on how movable the decorations are, it might be your easiest option to wait until just after Christmas...and remember that giving your client a steady hand and an extra person on a tall ladder after Christmas to get their decorations down faster for a shoot could be really good customer service move on your part; just remember to bring the rum and eggnog or other seasonal beverage for when you're done! It's looking like we'll have a few days that are presently open for shooting right after Christmas, so for a lucky few of you who can coordinate this, the option's open.

Your other option, of course, is to temporarily take their decorations down and reinstall them, or work around them. This works quite well if the decorations lend themselves to moving and temporary pulling down and putting up, but it does require a bit of advance planning, care, and time, since you don't want to be the one who breaks the irreplaceable ornament off great-great-grandma's tree. A few years back, I did a series with the team at Gogo Telugo of about a half-dozen interiors for a local interior decorating firm where the only time we could actually shoot was the week before Christmas. Since we knew we were going to have to un-decorate and re-decorate for almost every interior, the designers would go in an hour or so before I came in, pop off a quick set of iPhone shots of the decorations so we could remember where everything went, and pull the decorations into a room that wasn't going to be photographed. I'd shoot the project, then while I was packing gear up and heading to the next project, they'd hustle around like a set of magical Christmas elves reinstalling all the decorations. And repeat. This was a bunch of extra work, but it did mean we had everything all ready to go by the time they wanted to relaunch their website for the New Year!

Ovation Awards Photos: The Specs Have Changed!

We're a sponsor (and a big fan) of the GVHBA Ovation Awards for Metro Vancouver-area residential projects, and this year's call for entries went out a couple of weeks ago. Hidden in the large pile of paper (or lengthy PDFs, if you're flipping through online) that makes up the call for entries are a number of photo-related goodies and things to be aware of. If you're like most people, you zipped right by the photo specs on the way to seeing which of your projects might qualify and in what categories. As an architectural photographer, I of course perused the photo specs first, and noticed that they've made a bunch of solid changes this year that will affect how you prepare your entries and give you a lot of room for showing your project better and more creatively. Here's a rundown of what to be aware of, and what the consequences are:

  • File size rather than image size requirement. In past years, you've needed to submit images with a particular image size and resolution (it's been 2400x3000 for the last couple of years running). This year, they've dropped this in favour of a file size requirement of 5 megabytes. This is easy to check for: pull up the Finder (if you're on a Mac) or Windows Explorer (on Windows) and check to make sure that all .jpg files you submit are less than 5MB apiece. Notably, there is no minimum size, but we would suggest targeting something in the 2400x3000 range as that will generate a good 8x10 print at 300dpi. How you do this, and what you size to, can get complex, and it has a number of implications for how you submit. More on that in just a bit.
  • Any aspect ratio goes. Since there is no image size requirement, any good printable-at-a-reasonable-size-at-300dpi image will work at any aspect ratio. This means that if you have a 'widescreen' view of your project, you could now submit this, where you haven't been able to in the past. It also means that we don't have to crop your images to a particular size, and can compose at whatever aspect ratio as will show off your project the best. Having said that, as long as the Georgies and the SAM Awards require fixed image sizes, we'll probably still compose most of your images to fit an 8x10 print without much/any cropping. There are a number of places where going wider, taller, or square will help tell your project's story and possibly save you having to submit an extra image to show some detail that would show up on the edge of an image but have to be cropped otherwise. For example, this year you could submit an image like this:
    Ovation Awards Wide Sample

    ...whereas in past years, you'd be forced into a crop that would either emphasize the living room, or most of the kitchen, but not show how both relate:

    Ovation-Wide-Crop-A Ovation-Crop-B
  • You now have a "choice" photo. Some of you have likely had the experience of sitting at the Ovation Awards gala, having your finalist project come up on the screen, and wondering "why for the love of all things good and holy did the judges choose that shot when this shot was clearly better!?" (Then you got your award, had a celebratory beverage, and forgot all about it except for that little lingering bit of "what was I on about?" the next day.) The GVHBA heard us all: you can now indicate what image is your choice for marketing purposes. Think carefully about this: the choice photo is probably going to be the one that tells the best story about your project in one photo. On the flip side, it might be the 'coolest' shot of the lot--maybe it's your twilight exterior if you're submitting in a category that will let you submit one.
  • Video is permitted, but only in the Technical Innovation category (39). Category 39, better known by the mouthful Excellence in Technological Innovation in Residential Construction, is very cool. As chair of the GVHBA Suppliers' Council, I am pleased to point out that it's the only category where suppliers can enter as the primary entrant (provided you get a GVHBA builder/renovator to sign on with you as primary associate). It's also the only category where video is permitted. Let's say you're submitting a project that includes a fold-out corner cabinet design. You can and should show how this works in several photos, but the full impact might be better shown by a 15-second video, particularly if the thing you're submitting is innovative in its assembly or other not-obvious-in-a-still-photo way. We're happy to shoot and edit that little piece of video for you, for an extra charge (and about an extra half hour on site)--just let us know that you're entering this category and we'll talk it through.

What does all that file size gibberish mean?

If you have photos already that you might be considering submitting, you might have just checked them and found either that they're a lot bigger than 5MB, or a lot smaller. What to do?

  1. You have images that are way bigger than 5MB. Earlier in this article, I advised you to target a resolution that's around 2400x3000. If you're looking at the full resolution images we provide you, you'll probably find that they're often around 7000x5000 and tip the scales at 10-15MB. You have three options: 1. downscale them to something that will fit under the 5MB bar, 2. crop them down to something that will fit, or 3. dial down your JPEG quality settings and re-save until the image fits. Of these, we'd recommend one of the first two options. If you want to show everything in the image, then by all means downscale them--you'll preserve the composition of the image, and a lot of the detail. (It might actually enhance some of the detail depending on how you do it). If you have a large image where the important part to your story is a lot smaller, cropping the stuff you don't want to show is a good way to start--particularly because you don't have to crop to a particular aspect ratio, so you can take a nice tight crop that just shows what you want. We do not recommend taking option 3 because that gives you the worst of both worlds: you lose a bunch of your image detail, and you have a big image that makes the judges' life more difficult for no good reason.
  2. You have images that are way smaller than 5MB. Check the image resolution. If they're around 2400x3000 or larger, you are good to go. As an aside, it's entirely likely that you may run into an image that's a lot larger than 2400x3000 but is still well under 5MB, and that's OK. JPEG files use "lossy" compression, which means that large areas of your image that are close to the same colour, like white drywall and clear blue skies, compress well whereas detailed areas like grass and fabric occupy more space. If your image is much smaller than 2400x3000 (for instance, you're considering re-submitting your Georgie images for the Ovations), you're technically fine, but it's not ideal because you could be submitting a larger image with more detail, and the judges might zoom in on an area and wish to see something that isn't there but would be in a larger image. So if you have a larger version of your image, why not take advantage of the extra file size and show more of the fine detail that often sets your project apart from the pack? Do not upsample your small image to make it larger--this will introduce noise and artifacts needlessly. You're better off submitting a clear lower resolution image than a fuzzy higher resolution image, but a clear higher resolution image (which you can likely get from your photographer, or from resizing a higher resolution image) is the best.

Also, requiring 5MB images will mean that if you're on a slow connection, your images will take a few minutes to upload. And so will everyone else's, which is going to put a bit of load on the submission servers if you're hitting the last minute before the deadline. Yet another reason to enter early if you can.

Wow...this is stinkin' complex. Can I just call you and get it all taken care of?

Yes, you can! In fact, we'd recommend it. If you have full resolution images in your files already, we can take care of all this and size them so that you get the most from your images while still fitting in the submission requirements, for a nominal fee. If we made the photos that you're going to submit, we include image prep as part of our awards packages, so you can call us up and not worry about it. We're happy to take care of it all for you, since we practically live and breathe this stuff. And if you're going to submit a project and haven't had us photograph it yet, what are you waiting for?

Coming Back for a Visit

How about a little ghost story in honour of Hallowe’en? Here's an architectural one, from Enon Hall, a marvellous blog that tracked the DIY rehabilitation of an old family house in Virginia. After reading the Enon Hall blog a few years back, I picked up a copy of Genghis Angus' CD 12 Days whence the track comes, and the disc contains a couple of good tracks about heritage buildings (this, and Dust of Progress). Not surprisingly, band leader Allen Kitselman is now a practising architect; he gave me permission to post a link to the song since the CD is now long out of print. Listen here.

All the souls who have lived in this house come back for a visit press their faces against the glass to see what we've done with the place

Music aside, one of the most rewarding parts of being an architectural photographer is actually getting to be the “ghost that comes back for a visit” and re-visiting and re-photographing an old project. While a lot of photography gets done in the halcyon few days (or weeks, or months) between when the project is done and the client 'effs up the design…er, moves all their stuff in and personalizes the space, I relish a good opportunity to see how a building changes over time. In construction progress and heritage work, this happens very quickly: walls can be removed, things can be dug out and replaced, and entire floors built within the few weeks or so between visits.
My first really major construction progress documentation project was Christ Church Cathedral's most recent renovation project, back in 2003, co-coordinated by Proscenium Architecture + Interiors and Iredale Group. Some of you will probably remember when the place looked like this:
Christ Church Cathedral Vancouver interior before renovation
Yep: carpet, white donnaconna board on the ceiling, and old-style pew layout. Can't say I miss it! During renovations, that view looked like this:
Christ Church Cathedral ceiling renovation
And then, this:
Christ Church Cathedral front
...which got published full-page in Canadian Interiors magazine, among other places, and isn't too far off from the current view from the choir gallery.
However, for projects where a photographer’s work begins after the place is built, getting to revisit a building over time for commercial photography purposes is a rare and treasured experience.
I’ve had a couple of opportunities to do this recently. The first was another Iredale project: the Palmer-Rubin House in Anmore. I photographed this stunningly modern home in the hills above Burrard Inlet a number of years back when it was first built, and one of the notes the architect, James Emery, and I made at the time was that we'd have to come back in a good while when the landscaping had grown in. It's architecturally splendid, but as one expects, it's a little bare:
Modern Anmore Residence
So, fast forward five years, and I had an opportunity to take advantage of late spring/early summer weather and foliage to come back up and reshoot the "all grown in" exterior:
Modern Anmore Architectural Residence
The house has aged well, and now we see how it "pops out" from its landscape.
The next was thanks to one of my real estate clients, Robert Crowe. On a fine Sunday afternoon, he called me up with a listing at Origin at UniverCity that, of course, had to be shot on an evening that would highlight the view. This building seems to have a theme of "tight weather windows" for me. The first time I photographed this building was in December 2012. Porte Development had me photograph it at the last possible minute for the GVHBA Ovation Awards that year. The show suite was all done, but we had to wait out a run of nasty December weather, and had a tiny weather window where we might just have half a chance at getting a few shots. We ended up indeed getting a weather window...of about 15 minutes. Which was just enough to run outside from shooting the show suite, snag a boom lift and an operator from the construction crew, suit up with a harness and get several elevated 'hero shots' of the full development. For those of us with absolutely no fear of heights, it's always a good day when you get to ride a boom lift. This image is the "raw" pre-crop-and-edit version, where you can still see the lift machinery in the bottom corner.
After the project won a couple of Ovation Awards that year, writer Lynn Harrison (who coordinated the written parts of their entry) and I had a quick talk at the awards gala, and we thought that it would be a great run for a Georgie Award and recommended to the good folks at Porte that we should reshoot it when done and enter it in a few categories it wouldn't have qualified for at the time of the Ovation Awards.Which gave me another opportunity to rephotograph the place with the landscaping grown in and fences removed. The problem? We wanted to highlight the north-east face of the building, and the only time you get light on that side of the building is first thing in the morning, and from my experience as an SFU graduate, I happen to know that the SFU Burnaby Mountain campus is often up in the clouds and fog at the hours you would be getting the best light. So, another weather crap shoot.
Having soft light and big clouds actually flattered the building well. We got images like this:
The project ended up being a finalist in three Georgie Award categories that year, just as we hoped!
So, fast forward to a few days ago. Robert called me with a unit up at Origin to shoot, and after he gave me the unit number, it turns out that it was the unit next to the show suite. I'd probably been in that unit under construction, and since it faces south, I knew its rough layout and that it would have to highlight its window view. Sunsets, magic hour, the whole bit. This time, I could completely ignore the exterior and common areas, since I'd already photographed them for Porte's Georgie awards submission and could just re-license them out of my stock library. I checked the weather forecast, and the only day we could possibly shoot in the next week was...that day. So, it was time to carpe diem, grab the gear, and blast up the hill to take advantage of yet another weather window at Origin!
Porte Origin Burnaby modern loft
One of the great things about rephotographing a building is that you have a very good idea of what gear and what shots you need, so you can "travel light" and move very quickly. This was indeed the case, although there was one critical set of lights out in the kitchen that I had to fill in with flash instead. One of Robert's associates got to work as my 'voice activated boom' for the evening and got her upper body workout for the day holding the flash on a stand as far up as possible!


Capture One 8: a few weeks in

I've been using Capture One as the core of my architectural photography workflow for about a year and a half now, and having started out with 7.0, like many of us I have my fair share of scars and scrapes from climbing up the learning curve (and in 7, oh what a learning curve it was: early C1 7 builds were so buggy that as a new user, figuring out whether something didn't work because you didn't know how to use the tool or the tool was just plain broken put me in the habit of keeping forum.phaseone.com open in a browser on my second monitor most of the time--and don't get me started about seeing the crash dialog more than my photos!). Despite the pain, suffering, and frequent restarts, the results were definitely worth it. Later 7 builds got better, and I settled into a solid though sometimes frustrating workflow assisted by a small pile of shim scripts. One of the side effects of having a computing science degree is the tendency to say "if this isn't working exactly the way I want it to, pull out your editor and hack scripts until it does", and I've done a lot of this over the last while. It's a general rule (right up there with 'expose for the highlights') that Thou Shall Not Deploy A New Capture One Release Into A Critical Workflow, particularly when the release ends in zero. As luck would have it, the C1 8 announcement hit my mailbox a week or so into the start of September, which was the start of the most horrifically busy shooting season of the year, thanks to the Georgie Awards and a number of my clients having late-finishing projects. So I called the folks at Capture Integration to ensure that I could install 8 alongside 7, giving me a good safety net in case things went off the rails. With a mix of anticipation and trepidation, I hit the download link and installed 8, hoping for the best and fearing the worst.

Within a couple of hours, I'd spun one of my projects through it, giving it a good workout and exercising a number of new features. To my surprise and delight, the only crashes I experienced were due to it not having a proper license code, so a few hours later, I was on the phone with CI once again to snag one and call it an upgrade. Having been working with C1 8 for a few weeks now, there's a lot to love, and a few things that of course need improvement:

The Good:

  • Speed and stability. I edit on a mid2011 27" iMac with 24gigs of RAM and a 250gig SSD, and capture tethered on a mid2011 13" MacBook Air with 4gigs of RAM. Both run Mavericks. That's two ends of the spectrum, and 8 is both a lot faster and more importantly, more stable on both machines, Over the past few weeks, I've had maybe 10 crashes tops in near-daily use, and several of those were due to a glitchy Thunderbolt to FireWire adapter on the Air. Rendering and a lot of interface actions feel snappier, and exporting JPGs and TIFs, especially on the iMac, really scoot along. In fact, I've ended up hitting the Process button twice a few times before realizing that a single file export happened faster than C1 could throw up a progress indicator. Awesome. (Now I have to script a 'ding' on process completion, as Lightroom does, to keep me from doing this)
  • Better support for sessions on network drives. When I'm done delivering a project, I throw the whole session onto my QNAP NAS. In C1 7, for reasons known only to the boys in Denmark, sessions on network drives were horribly unstable. So much so that I got into the habit of downloading sessions back onto my local hard drive and then RSyncing them back up to the NAS, lest C1 hose completely. This is now almost unnecessary. There is one case where it seems to be necessary still, and that's when migrating from a 7 session and regenerating previews. More on that later. But once you have an 8 session with previews built, you have the luxury of being able to edit on a session without having to pull it onto a local drive first.
  • New highlight/shadow recovery processing. When shooting interiors, I often end up using highlight recovery to pull skies and window areas on interiors into a range that looks reasonable but doesn't require me to do exposure fusion and sky replacement. If I'm shooting on the Phase, there's so much dynamic range available that what would often require multiple shots and exposure fusion to pull off can be done with a flick of a slider. 7's algorithms for highlight and shadow recovery were...touchy, to say the least. It was often a matter of a few points on a slider between 'great' and 'weirdly fake'. 8 is much better in this regard in most places, though there are a few places where the old algorithm gave better results. I'd hope that there will be a 'classic' vs 'new' setting on those sliders in some future version, just like the ability to select your Clarity algorithm.
  • Adjustment layer improvements. This is HUGE. The ability to do highlight/shadow recovery on an adjustment layer, at long last, convinced me to pull my wallet out and finger my credit card. The ability to change white balance on an adjustment layer was worth the price of the upgrade, and the risk of causing myself pain by, uh, throwing a Phase One .0 release into a critical workflow. These two features have saved me enough time and frustration to pay for the upgrade right there. Local white balance and local recovery are the two things that would often have me creating multiple variants, processing to multiple Photoshop layers, and using layer masks to bung the whole thing back together. That was of course slow but often necessary. The new Repair Layers I've found to be of limited usefulness, but I also haven't explored them much either yet. If I need to do that level of work on an image, chances are I'm going to be taking a round trip into Photoshop anyway.
  • Templates. I've always liked the ability of Workspaces to put your palettes and tool tabs where you want them, and it's nice to finally have the same ability for stuff like tether settings, folder layouts, and naming rules. (But why can't I use the image number as an element in a Processing naming rule? I'd love to be able to change IMG_2755 or TQ-west13-2755 into MKPhoto_2755 on delivery.)

The So-So:

  • Tethering improvements. I shoot almost entirely in a tethered workflow on location, so this is pretty critical. My P45 has always been pretty stable tethered, but C1 has had occasional weird issues tethering my Canon 5D Mark II. C1 8 seems to be a lot better in this regard, but the longstanding bugs in magnifying in live view seem to still be outstanding. If you don't need live view, C1 8 is a lot better than 7, but I still find myself using EOS Utility for tethering and dumping the files into the Capture folder, letting C1 merrily generate previews in the background. EOS Utility's live view support is far and away better than C1, still, at least on my 5D2.
  • Masking. The masking tools are less laggy than the ones in 7, but I keep running into weirdness with Auto Mask working inconsistently, and the flyout that lets you choose draw/erase mask, well, not flying out. If you're using the speed keys to move between these tools, this UI weirdness is not such a big deal. However, about every third 7 maintenance release, the eraser on Wacom Intuos-series tablets no longer toggles the erase tool as it should. Guess what? 8's is broken again. (Yes, I know you can set up a macro in the Wacom control panel to work around this, but then that breaks when C1 fixes it. You just can't win.)
  • LCC generation is still single threaded. I shoot with a tech cam, which means creating an LCC for just about every shot. Unless I absolutely need one on location, I end up generating all my LCCs en masse when I load the session onto my editing machine. It's mildly annoying that I have to watch one CPU get pegged while I'm forced to go get tea or surf the net while I wait for a couple dozen LCCs to build before I can really get down to work on a session. Unlike C1 7, you can generate LCCs en masse without corrupting your session, which used to happen so frequently in 7 that I'd do the LCC generation on a backup, throwaway copy of the session.

The Ugly:

  • 7 to 8 session migration. I've tried opening a lot of 7 sessions in 8, and I can count the number of times it's actually worked on one hand. That's not too surprising given the number of times I've had a session file break between 7 maintenance releases. I no longer bother, since all the critical metadata and editing decisions are outside the session anyway. I'll just blow away the .cosessiondb and regenerate it. Which forces a regeneration of all the previews, but at least I have a stable, and fast, session at the end of it all.
  • Regenerating previews en masse on a network drive. I've had mixed results with this. Sometimes it works great. Sometimes regenerating previews will hang in the middle of the job and never complete, in which case copying the session onto a local drive before rebuilding will do the trick. I haven't benchmarked, but I suspect that copying, rebuilding previews, and RSyncing back is potentially faster. This seems to be better on AFP-mounted shares, which means there might be some weird network compatibility thing going on.
  • Running externally edited TIF files through a C1 process recipe. Because C1 process recipes are so awesome for setting metadata, resizing, and ensuring consistent colour profiles on the fly, I usually prefer to edit what I can in C1, then work files in Photoshop, select the edited Photoshop TIFs in C1, rate them accordingly, and process them using C1. There is a bug, acknowledged by Phase One, that causes the previews to get out of sync and Regenerate Previews to not work correctly, causing exports of edited TIFs to fail with a Code 19 or other oddities. If this bites you (and it bites me all the time), close C1, fire up a Terminal window in your Capture folder or wherever you're processing from, and run: rm CaptureOne/Cache/Thumbnails/*tif* rm CaptureOne/Cache/Proxies/*tif* then reopen C1, and once it regenerates the previews for the files you want to export, process and you'll be good to go. This video shows how it breaks (and it still breaks in 8.0.1)

All in all, apart from a few niggling complaints, I'm the happiest I've ever been with a C1 release, and I'm very glad to have take the risk of upgrading at the busiest time of the year.

End of another Georgie season

There's a wonderful prayer in the New Zealand prayer book that we say at Compline at Christ Church Cathedral every week. It ends like this: "It is night after a long day. What has been done has been done; what has not been done has not been done; let it be." To paraphrase it: "It's the deadline after a long and busy Georgie season. What has been entered has been entered; what has not been entered has not been entered; let it be." That is, until the Ovation Awards (I'm told the call for entries will be opening in another couple of weeks). Or next year, if your completion schedule was what was in your way.

It's been a very good and extremely busy season--we've photographed some amazing projects, seen some other amazing projects that weren't quite ready in time for the deadline, and we're hoping the best for all of you in your respective categories! For those of you who waited until the last minute, and for our fellow writers, photographers, and all others running similarly wacky schedules: you can now relax and catch up on the sleep you haven't been getting. It's going to feel weird tonight not being up until the wee hours putting finishing touches on photos, and I'm hoping to be dreaming about something other than Capture One adjustment layers, and not waking up in a cold sweat chanting "dusk images are acceptable as long as all relevant building detail is visible."

And may the best projects win!

Dead Gear Society: PAP Edition

I used to participate in a bicycling forum that had an area where people would report when a piece of equipment failed, how, and under what conditions. This was tremendously useful for figuring out what worked, what didn't, and what you might expect if something busted. Georgie Awards season seems to be particularly hard on gear (and photographers, for that matter): you're shooting constantly, you're moving quickly, and everyone has the same deadline and seems to save things to the last minute, so things get "ridden hard and put away wet". Every year, something often gets busted over the course of the Georgie rush--even if it's something minor like a flash trigger (that's happened a couple of times), or cabling. We all love it when Georgie projects win, but it's also instructive to see when gear...loses it big. So I'm making a couple of contributions to the fine tradition of reporting gear failures. Onward. I shoot a fair number of exteriors using pole aerial photography (PAP). PAP is a great way of getting a second or third-storey elevated position on a building, and it's particularly nice for real estate work and for highlighting things on roofs. The project I photographed earlier today is a perfect candidate for this: it's a three-storey townhouse with...solar panels on the roof! So, out came the pole, and photos like this got made:

Tien Sher Jade Pole Aerial

Standard developer photo fare in this market, in other words. This was on a windy early afternoon, with inconsistent light--as you can see, it went from bright sun to dark cloud, and so I was having to move quickly. Moving a pole aerial setup without an assistant is a bit of a chore: you retract the pole, then with both hands, slide the pole out so you can carry it by the weight of the camera (and if you shoot tethered, as I almost always do when shooting PAP, grab your laptop with your now-free hand). That's the usual and "safe" way to do things--but when you might only get a few seconds of decent light, you can often tweak your framing by scooting the pole along the ground, particularly if you're on wet grass. My luck ran out with this approach: while moving the pole into position, elevated at about 12 feet, a gust of wind pushed the pole right when I didn't have it solidly stabilized. Even a partially extended pole with a Canon 5D2 and a 17-40L on it gets unwieldy quickly in those conditions...and down the whole thing went. Somewhere in the fateful second or so between "we're there, let's shoot", "aim for the grassy boulevard!", and "f*** nooooo!" something interesting happened: the top thread of the pole sheared off, sending the pole one way and the camera, pole adapter, and resting plate, rolling off into the street. Ouch.

sheared off pin

The good news: the camera survived, amazingly. (I likely have Really Right Stuff's custom-fitted Arca-Swiss L bracket to thank for that; a single point screw tripod plate would have probably ripped the tripod screw clean out of the bottom of the camera) So did Pole Pixie's Pro screw adapter, the Desmond Arca-Swiss-compatible clamp, and the foam resting plate--though it's even more banged up than it was before and I should probably replace it. And apart from being cosmetically torn up, the RadioPopper JrX trigger I had in the hot shoe also seems to have survived.

The bad news: the nearly new 17-40L lens (bought to replace a previous copy of that lens which, uh, I dropped a couple of times and after a couple of trips back to CPS, wouldn't hold its focus particularly well) and the expensive circular polarizer took all the force. The polarizer's obviously toast. The lens I'm not so sure about--I'm calling CPS first thing on Monday to see about repair pricing. My gut feeling is that it's probably going to end up as an expensive paperweight, but since the glass seems to be fine, I might be able to get away with having the front ring replaced and the whole thing recalibrated.

photo

Now what? Apart from figuring out what to do about that lens (it's a backup lens, so I kept merrily on shooting on that project with other lenses), I now need to put together a new PAP rig. The resting plate isn't intended to take the full weight of a falling camera, but it's certainly done well breaking falls--so it, or a variant on it, is a must. The Pole Pixie adapter survived with nary a scratch, so it's good to go, and so is the Arca clamp. Pole Pixie has a 5-section pole that looks better than the pole I was using (which worked well for about 5 years)--and it's seemingly a rebadge of a pole that's actually designed by a company in Ontario for display use, so to avoid customs issues I'm trying to see if I can source the original. A few months ago, I was considering that a safety line rigged from the camera to a point below the pole top would probably be a good idea, and it turns out that I was right: had I rigged something, the lens might have survived. What looked like a possible weak point...was.

So now I have an industrial design problem to solve: since it's a near truism of pole aerial photography that Someday, Your Gear Will Fall, I'm thinking that the Real Solution to this is to put together a lightweight roll cage--ideally, out of bent metal rod, but prototyping it from metal drywall angle would probably do the trick and would be a lot better than nothing. The cage would be set up to not obstruct the field of view on the 17TS-E (yes, I've been known to fly that $$$$ piece of glass on the pole...call me crazy, but the results are worth it) when shifted, and would attach to the pole below the threads--possibly with a plastic or metal collar.

Exteriors first, interiors later?

It's almost September, and that means: 30 days until the Georgie Awards deadline. Time to get off the beach and get to work on your marketing efforts, eh? Only a few more days like this

There's an old joke that floats around Vancouver: "What do you call five days of sun followed by two days of rain?" "A weekend". Or, if it's this summer: "What do you call three weeks of sun followed by three days of rain?" "Labour Day Weekend". We're supposed to be getting some more dry, sunny weather soon after the long weekend (hooray), but that brings up the question: what if my exterior is done but we're waiting for the light fixture that's on the slow boat from Italy?

That's easy: you let us know that, and we shoot the exterior first, while there's good weather around, and shoot the interior later. We normally charge a bit extra to cover the trip out, but the results are always worth it. You'll get the best of both worlds: an interior that's done and an exterior that's showing in its best light.

It gets better, though: for our awards packages, we can often throw the extra visit in for free, because everyone's on the same deadline and it makes the scheduling easier. Several of our clients are already taking advantage of this, so if you're in the situation of having a perfectly gorgeous exterior and a few bits and pieces to work on on your interior, let us know and we can make that scheduling happen.